This is tested on the latest daily snapshot of Ubuntu 8.04 Hardy Heron.
This is a follow-up on my guide for Ubuntu Edgy guide.
I still receive responses on my older guide from people with problems getting this cool desktop feature to work, I hope that with this guide I can show people just how simple and user friendly Ubuntu Linux have become throughout time, and also to encourage other people to follow the same line when writing documentation for the novice user.
Enjoy.
First things first, my system specs.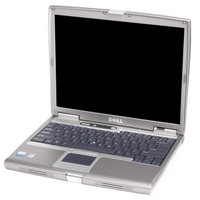
My system specs.
Laptop is Dell D610
1GB of RAM
CPU is Intel(R) Pentium(R) M processor 1.86GHz
Graphic card is ATI Technologies Inc M22 [Radeon Mobility M300]
The graphic card driver:
In this first part of the installation we will be installing the proprietary driver for graphic card in order to gain maximum performance from the system.
You might not have the same graphic card as me, but the steps should be similar to yours even if the graphic card is different, but note that not all graphic cards have a proprietary driver available or might not be necessary at all.
First start the program that controls the hardware drivers as shown in the picture below.

If you are asked to enter your password then you have to do so.
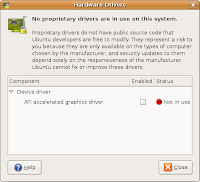
The main windows should look similar to this.
Check the "Enabled" box to install.
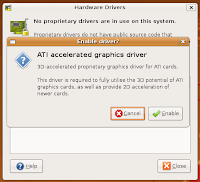
If you see the following confirmation box appear chose "Enable" to continue.
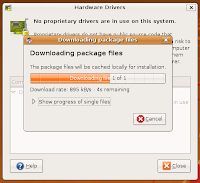
And now watch the driver install onto your system.
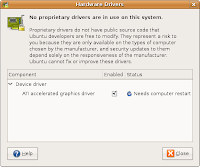
When finished click "close" to continue.
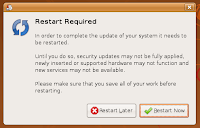
And reboot your system when asked, to complete the installation of your graphic card driver.
Setting up 3D Desktop:
Now the time has come to prepare the system, by this we will need to enable Compiz, it comes installed with Ubuntu by default.
First start the "Appearance" Application as shown below.

If you are asked to enter your password you need to do so
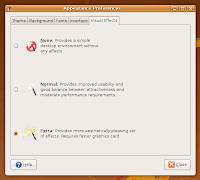
When it's started, select the "Virtual Effects" tab and then select "Extra", and "Close" then application.
If it ask you to confirm and you can see what is on the screen, press "Keep settings".

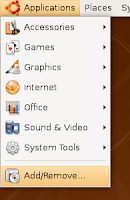
Now you need to install one applications to help you configure your 3D desktop, to do so start the "Add / Remove Applications" program an show here.
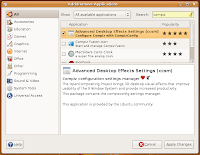 Here you need to do several things.
1. Under "Show" select "All available applications"
2. Under "Search" write in "compiz"
3. Tick "Advanced Desktop Effects Settings"
"If it asks you to enable comunity maintained software, choose to do so"
4. Click "Apply" to apply the changes and watch the software install on your computer.

When the application is installed click "Close" to continue.
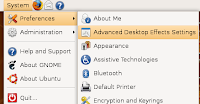
Now that we have installed the application, we can start configuring our desktop, start the "Advanced Desktop Effects Settings" application to configue the 3D desktop.
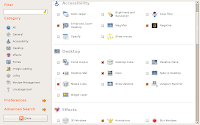
When the application have started, the first 2 plugins we will enable is "Desktop Cube" and "Rotate Cube" to test it works, tick the checkbox on both, as shown in the picture.

It might come up with a warning of conflicting plugins, click "Disable" to continue.
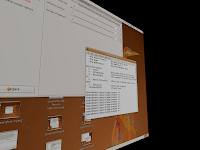 To test your rotating "cube" press and hold down
"Alt + Ctrl + Left-Mouse-Button + Move Mouse"
Most likely you will only have 2 sides by now.
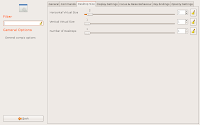
This can be changed in "Advanced Desktop Effects Settings" under "General Options" and tab "Desktop size", change "Horizontal Virtual Size" as shown here.
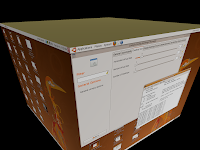
Now you should have a full rotating cube, test it with the commands shown above.
I wont be going into more details of the configuration of your desktop, but will let you play with it yourself, basically don't be afraid to look at all the plugin's and test them out, if you click on then you can find help see how they are activated and change them to your own preferences.
After at little bit of playing around you can easily get a cool looking desktop.


Thats it for this guide, tutorial etc.
Hope you enjoyed it and it worked out great for you.
Comments and suggestions are most welcome.
-Lennart


38 comments:
thanks, worked great :)
Hey lennart, thanks for your tutorial. I am really surprised it worked so easily. Thanks a lot!
thanks for your tutorial!!!
Great...
Easy and work!
I am french and i speak a little but it is very simple with your tutorial ...
Sanackas.
Wow, now my computer screen really looks fine. Simple and easy to follow tutorial. Thanks a lot.
thanks . for three night straight i am looking for tutorials and all of them were terminals ,codes and stuff like that,i had no idea how easy it was until i found this blog thanks again !!!
tegos
Hola,
Unfortunately this is not working for me, I have an X1650 and after doing the driver installation and rebooting, it stops loading (before the login screen) and I only get a blank screen. The same happened after installing ENVY. Any input more than welcome...
Fernando
Thanks! My first day with Ubuntu so I was in need of a really easy to follow tutorial. It's looking great.... thanks again...
hey, great guide. thanks a ton. been using linux for a total of 10 minutes and i got it up and running. thanks again!
Great tutorial!
I can use 3D desktop now:-)
thank you very much...i can use the desktop cube now...
thnx....
Thanks, that was really easy. I've really appreciated your edgy tutorial when I needed it. I'm amazed at how simple it is now.
merci je vais essayer , c tres facile pour tous le monde
I Really like the way you have explained with screen shoots... i just followed the steps and Booom its ready... Good job .. Ila
hi really easy, and it works great, i would like to know if you can help me 'cause i wanna install on my ubuntu 8.04 the mac menu bar on my desktop can you do a tutorial? thanks any way
thanks! it Works!!
Great!
thx! setting it up made easy with your tutorial~
Thanks Lennart for your time explain how to use and install the compiz.
I i'm very happy foy enjoy the 3d effects, i'm running Ubuntu 8.04 in a toshiba laptop Satellite P205-S6237 1 gb ram intel grafics bundle 945GM and works fine just follow your explanation
Best Regards
Man, this just worked great. Thank you very much. I tested ubuntu for a while in parallel using winbugs xp, I made a decision and now I am using only Ubuntu 8.04, I JUST LOVE IT. Drink the pill from matrix and get rid of microsoft domination.
Thanks a lot man.
Tried out with 8.04. Works like a dream ;)
Thanks for your heads up!! really useful. I got a chance to try with my live Cd. the cool thing is, it worked perfectly in Live CD too.
thanks again.
Thats awesome, thanks for letting me know!
superb ...awesome..
Worked and your tutrial was very clear and so easy.
Cheers
Sree
India
THANKS A LOT ! >:D< THIS IS WHAT UBUNTU MEANS ! HELPING EACH OTHER ! >:D<
Thank you for posting this! I was trying to figure out what these exact steps installed (compiz or beryl). I did these steps on my own but didn't know why ctrl+alt+up arrow wouldn't work but I missed that installing "compiz" gave me an "advanced destkop settings" app. Cool, you solved it for me!
Thanks for the great tutorial. I was assuming that I require a graphics card like ATI or Nvidia to get this working but it worked like a cake walk with Intel on board graphics card.
One small note missing from the tutorial is that: it seems we will require to configure the 4 desktops with 4 columns & 1 row to get the cube effect. Other combinations do not seem to work (atleast for me). Thanks again.
thank you!! your explanation is so clear! I'm enjoying the effect on my desktop
Thnx for the great tutorial.
It's much simple and a very clear explanation of the steps.
Testing it out.
This guy knows his stuff. By replacing the composite value from 0 to 1 my Appearance setting was able to be set to extra thus allowing me to run 3D desktop.
thanks man!i thought this would be more complicated ... but it was so simple!!!
Thanks a lot! Have to set vertical height as "4"... I love Ubuntu :D
Ok, I had the problem where the system->preferences menu did not show the "Advanced Desktop Effects" item.
Sovled it by running Synaptic Package Manager and installing compizconfig-settings-manager
Now it works like a charm.
Coooooooooool this really worked
i had a minor issue ... the advanced desktop will not get installed directly .. but the compiz fusion installation has to precede ....
correct me if wrong
How to really initiate the cube option from Live CD. I followed the instruction here and started the compiz setting manager. Inside that General option enabled the Desktop cube and all. But how to see it running.
this has been the most helpful site so far. Cheers!
LUKE.
This is real cool, my congratulations to you, good job. Can you do it for the 9.0 version too ?
Thanks
In Jaunty 9.04 it is CompizConfig Settings Manager instead of Advanced Desktop Effects. Otherwise, your instructions were great!
every time i try to increase the visual effects it says "Deskto effects cannot be inabled" waht do i do?
Post a Comment